Reviewing and following up on responses
Read submitted answers, add internal status notes, and make deliberate corrections.
- Open the survey's Results tab and choose Results editor.
- Find a response by its date and identifying details. Choose View answers to read it.
- Set a Status and internal Note if your team uses them. Agree what the colours mean; the default statuses do not define a workflow for you.
- Click Save to record the changes.
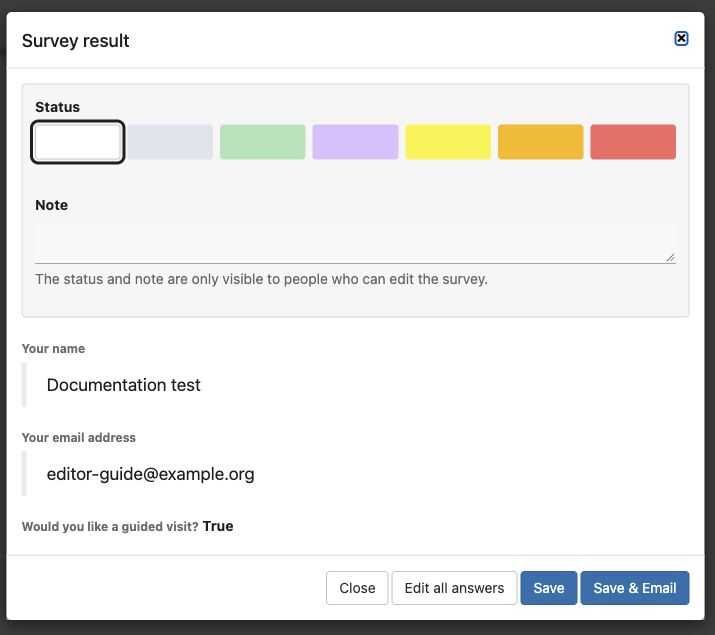
Read the answers below the internal status and note. Save & Email also sends a message; ordinary Save records your changes without that action.
The status and note are visible only to people who can edit the survey. View answers keeps respondent answers read-only but allows editor-only answers to be completed. Those editor-only answers can be visible to the respondent; use the internal note for internal follow-up.
Use Edit all answers only when correcting the response itself is intended. Check the entire response before saving. Save & Email also sends a message to the respondent; use it deliberately and check the destination. Editor-only answers can be included in this message even when ordinary confirmations omit answers.
The results list can link a response to a person. Check the match carefully; this is separate from creating login credentials.
Use Show charts for summaries of closed questions and Printable list for a readable overview. Charts are not a substitute for reading open comments. A configured special handler may send responses elsewhere instead of saving them here.
Delete only the intended response and read the confirmation. Deleting a response does not recall emails or exported copies.